Creating a n robust CI/CD pipeline is essential for maintaining a seamless workflow between development, testing, and production environments. In this guide, we’ll walk through setting up AWS SAM Pipelines to deploy your application to separate AWS accounts for development (DEV) and production (PROD). By the end of this post, you will have an application deployed across two different accounts. Updates to the source code repository will trigger a pipeline sequence that first deploys the application to the test environment, and upon successful testing, promotes it to the production environment.
Benefits of Using a CI/CD Pipeline
Implementing a CI/CD pipeline helps ensure that fewer bugs make it to production servers and promotes best practices in testing. Automated deployments enhance the reliability and efficiency of your workflow, reducing the risk of human error and enabling faster release cycles.
What is AWS SAM Pipelines?
AWS SAM (Serverless Application Model) Pipelines streamline the process of deploying serverless applications. It simplifies CI/CD pipeline setup, making it easier to build, test, and deploy serverless applications on AWS.
Why Use Separate Accounts for DEV and PROD?
Using separate accounts for DEV and PROD environments enhances security and ensures a clear separation of concerns. This approach helps in isolating development activities from production, reducing the risk of accidental changes impacting your live environment.
Prerequisites for Creating the Pipeline
Before diving into the pipeline setup, ensure you have the following:
- Two AWS Accounts: One for development (DEV) and one for production (PROD). The pipeline will first create and deploy the CloudFormation application stack on the DEV account and then, if successful, deploy it to the PROD account.
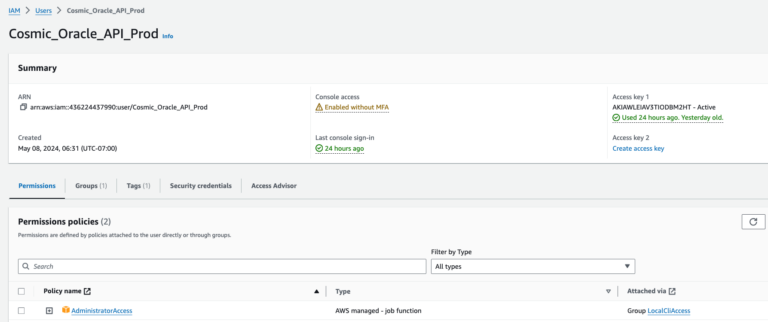
- Administrator Users: Create an admin user on each account (e.g.,
userDEVanduserPROD). Ensure you create and save the Access Key and Secret Access Key for each user. - Local Environment: Set up a local environment with AWS SDK installed. Create AWS credential profiles for each of the users created above.
Pipeline Stages
The pipeline consists of several stages, each crucial for the deployment process:
- Source: The pipeline starts with the source code repository (GIT), where the source code is managed.
- BuildAndPackage: This stage involves building and testing the application code.
- Deploy Test: Pushes the application and resources to the DEV account for testing.
- Approval: An optional manual approval stage that requires manual authorization before proceeding to production deployment.
- Deploy Prod: Deploys the fully tested application to the production environment.
Implementation
Step 1: Install AWS SDK
First, install the AWS SDK. Follow the installation guide to set it up.
Step 2: Create Admin Users in Each Account
Using IAM, create an admin user on both the DEV and PROD accounts. Ensure to generate and save the Access Key and Secret Access Key for each user.
The App
I’m starting with an openapi.yaml and template.yaml files that define an API, some lambda functions, and permission structures. Your application may be different, perhaps even a single python file? 🙂
In my console using my DEV account profile:
STEP 3: CREATE THE PIPELINE
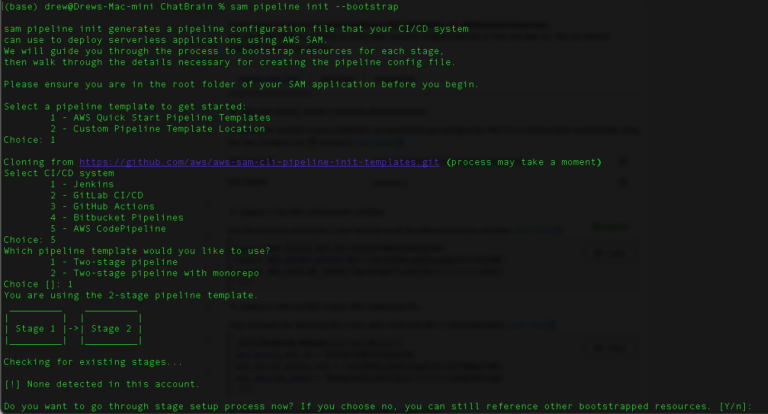
Navigate to the command line of the folder for your project, then use the sam pipeline init command
sam pipeline init --bootstrap
to initialize the pipeline. Here’s a breakdown of the steps:
- Select Build Templates: Choose ‘AWS Quickstart Templates.’ These include templates for you build, test, and deploy stages of your pipeline. The default templates are a good starting point.

Step 4: Choose your CI/CD provider
- CI/CD system. I’m using AWS Codepipeline so as to integrate well with the other AWS services. Also, codepipelines is serverless so I can pay as I go. Other options include Jenkins, Gitlab, GitHub Actions, Bitbucket Pipelines. I’ve used the GitHub actions in the past and it works great. That option basically builds and unit tests the code on GitHub Actions and then calls back into codepipeline when those stages are complete.

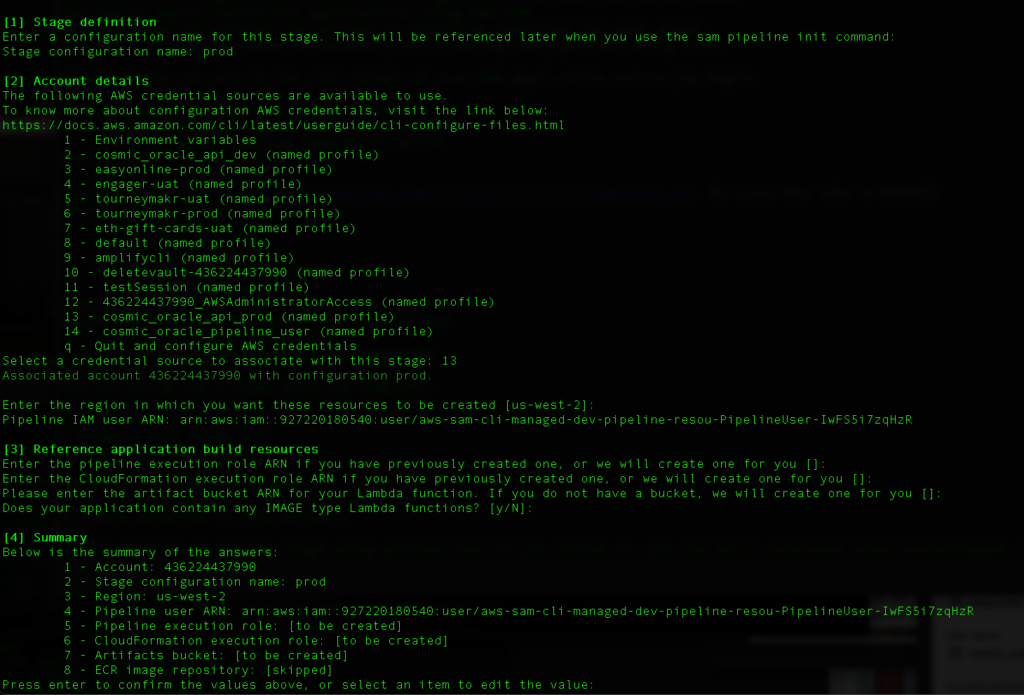
- Pipeline Stages: Select a two-stage pipeline. i.e. dev -> prod

Step 5: Setup the DEV stage of the pipeline
‘aws configure’
So for the initial dev stage, select the user account that your created for your dev account.
Enter region where you will be deploying the resources.
Let SAM pipelines create the roles and buckets for you.
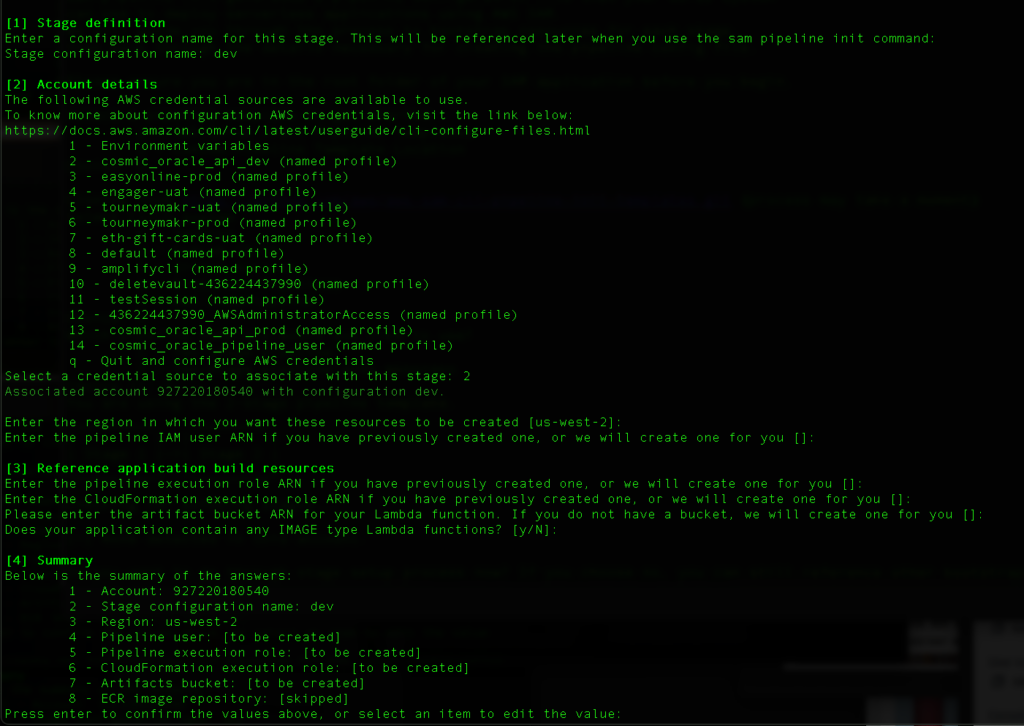
- Resource Creation: Allow SAM to create the necessary pipeline users, roles, and buckets. There will be one bucket on the DEV account and one on the PROD account.
- Permissions: Add necessary permissions to the user accounts and add permission policies on the bucket created in the PROD account to allow the DEV user to write to the PROD bucket.
SAM will create an IAM user that will be used to run the pipeline tasks, a role for those tasks, a role for Cloudformation to deploy the resources, and an artifact bucket to be used to pass results from one build stage to the next.

As SAM creates the pipeline user it also creates credentials for that user. You might want to place those credentials in the ~/.aws/credentials file. Note that if you already have profiles setup in the two accounts, you can re-use those.
[myapp_pipeline_user]
AWS_ACCESS_KEY_ID: access_key
AWS_SECRET_ACCESS_KEY: secret_key
Repeat the stage definition for the prod stage. Use the same choices except choose the profile for the user created for the PROD account.
Step 4: Choose your GIT provider
I’m using CodeCommit but many folks use GitHub or Bitbucket. The SAM pipelines has integrations with multiple GIT providers.
For Codecommit, just supply the name of the repo. This repo should exist on the DEV account.
STEP 6: provide names for the dev and prod application cloudformation stacks
I’m using CodeCommit but many folks use GitHub or Bitbucket. The SAM pipelines has integrations with multiple GIT providers.
For Codecommit, just supply the name of the repo. This repo should exist on the DEV account.
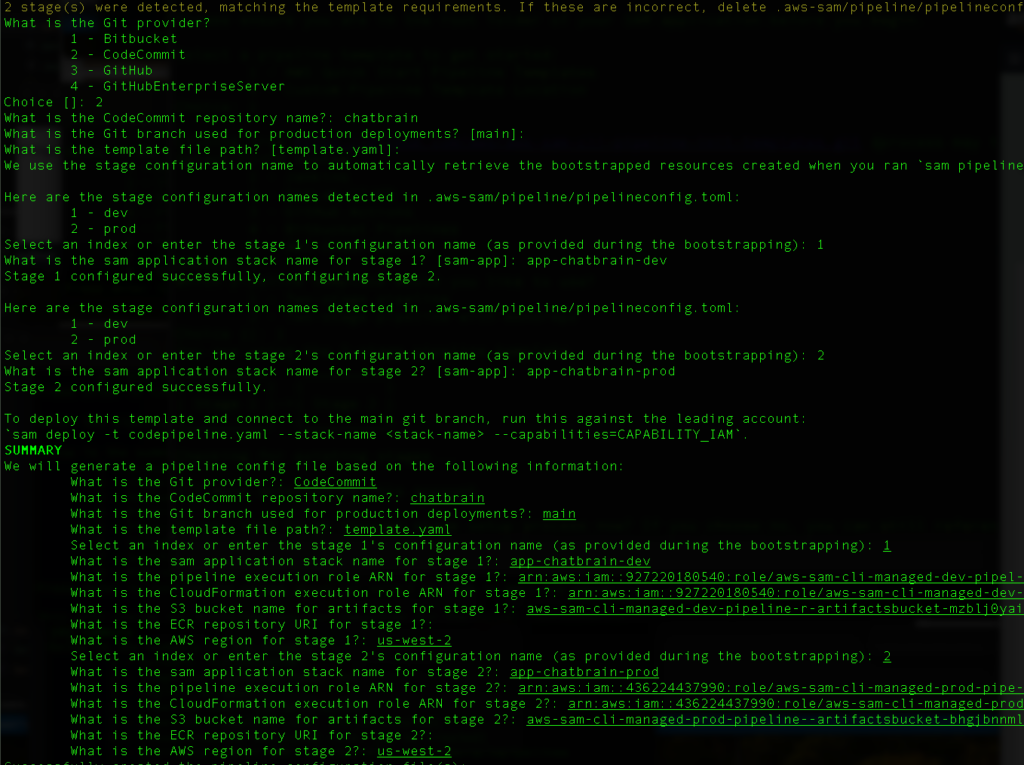
If all goes well you should have these files created. The files are based on the default AWS sam templates that we choose in step 1.

Step 6: Deploy the Pipeline
Step 7: Set the user permissions for DEV user and PROD bucket
Make sure you give the userDEV a permissions policy similar to the one below.This is half way there to allowing the cross account pipeline.
{
“Version”: “2012-10-17”,
“Statement”: [
{
“Effect”: “Allow”,
“Action”: [
“s3:PutObject”,
“s3:GetObject”,
“s3:ListBucket”,
“s3:DeleteObject”
],
“Resource”: [
“arn:aws:s3:::aws-sam-cli-managed-default-samclisourcebucket-e1sas22djx0h”,
“arn:aws:s3:::aws-sam-cli-managed-default-samclisourcebucket-e1sas22djx0h/*”
]
}
]
}
Place a bucket policy something like this. Use the dev-account-number:root, and list the bucket used/created by AWS SAM:
{
“Effect”: “Allow”,
“Principal”: {
“AWS”: “arn:aws:iam::dev-account-number:root”
},
“Action”: [
“s3:PutObject”,
“s3:GetObject”,
“s3:ListBucket”
],
“Resource”: [
“arn:aws:s3:::aws-sam-cli-managed-default-samclisourcebucket-xxxxxx”,
“arn:aws:s3:::aws-sam-cli-managed-default-samclisourcebucket-xxxxxx/*”
]
}
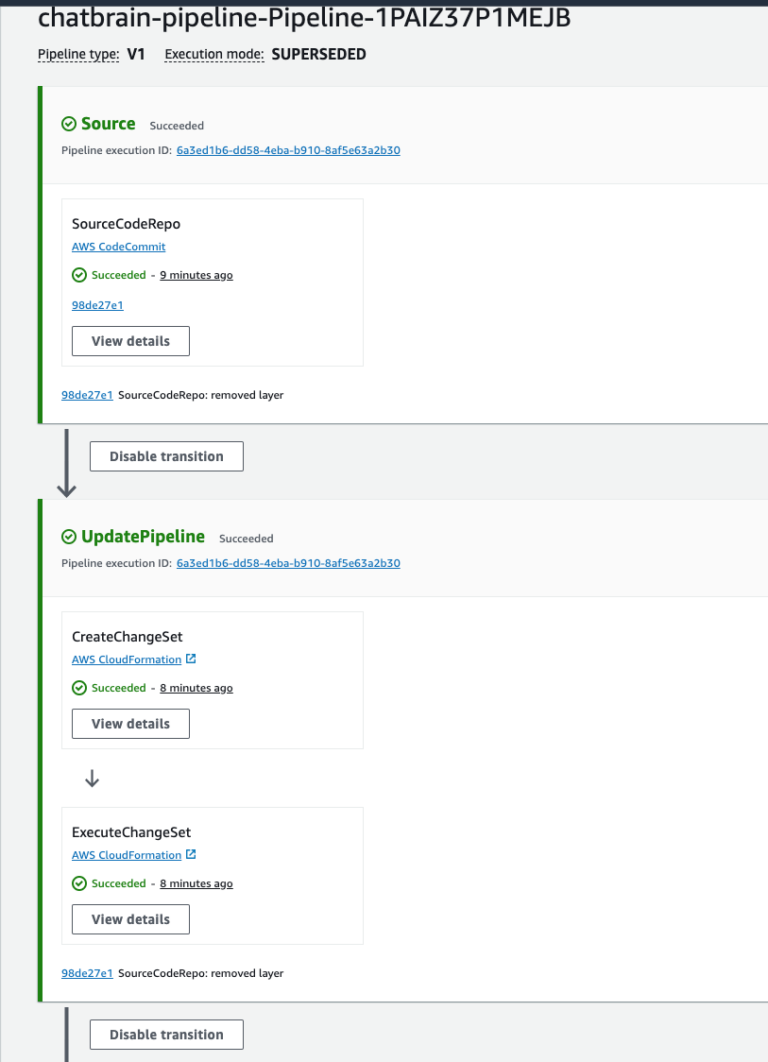
And finally after a futzing around a bit more you have a working pipeline that should serve well.
Conclusion
By following this guide, you’ve set up a CI/CD pipeline using AWS SAM Pipelines that deploys your application across different AWS accounts for development and production. This setup ensures a smooth, automated workflow from code commit to production deployment, promoting best practices in testing and deployment. Happy coding!
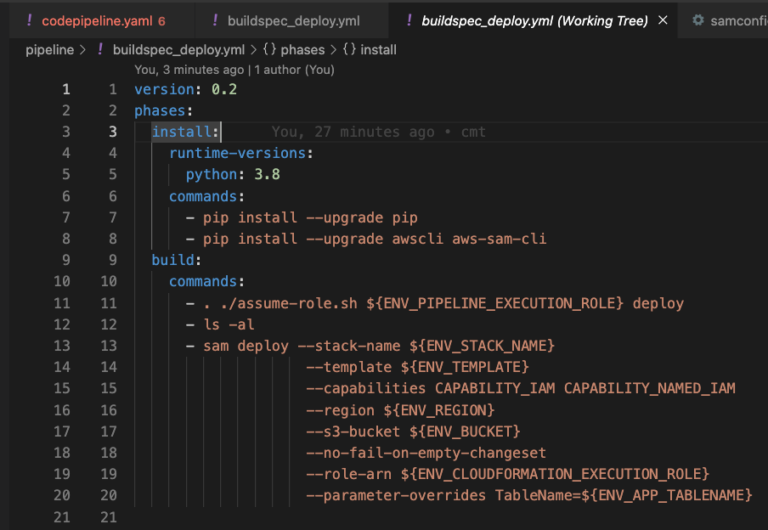
One note that you will have to modify your buildspec_deploy.yml file to add the CAPABILITY_NAMED_IAM to the capabilities, and also any environment variables required by your template or lambda functions.
